Finger Lakes Bonsai Society
  • Home
  • About
  • Upcoming Events
  • Bonsai Info
  • Contact
  • Blog

Bonsai Information and Techniques

This page is one that will continue to grow and expand as materials are covered in our monthly meetings. Be advised, the topics covered here will be done so as fully as possible, but we encourage beginning bonsai enthusiasts to come to our meetings and ask questions before attempting the techniques discussed. 

Current Seasonal Topic!

Club Talks

rootoverrock.pdf
File Size: 2041 kb
File Type: pdf
Download File

larch.pdf
File Size: 552 kb
File Type: pdf
Download File

Record Keeping

If you wish, like many of us here in FLBS, to keep closer records of your trees, you may find these files useful.
​Help yourself!
stylingchecklist_portrait.pdf
File Size: 29 kb
File Type: pdf
Download File

stylingchecklist_landscape.pdf
File Size: 30 kb
File Type: pdf
Download File

stylingchecklist.xlsx
File Size: 37 kb
File Type: xlsx
Download File

Wiring Technique

We had a great presentation on wiring at our January 2018 meeting. Check out the pdf version here:
wiring.pdf
File Size: 3305 kb
File Type: pdf
Download File

Here is a summary of the Bonsai Mirai wiring techniques shown in Ryan Neil's three videos (which we encourage you to watch because he visually walks you through it):
miraiwiringsummary.pdf
File Size: 111 kb
File Type: pdf
Download File

Bonsai Pest and Disease Control

Knowing what is ailing your tree is crutial to fixing the problem. Be vigilent! You won't be able to treat in a timely manner if you don't notice the pests or disease early enough. 
As requested by our members at one of our meetings, here is a pdf of the slides showing examples of pests and diseases and how to treat them. Be sure to use these measures safely! Protect yourself, and treat outside, spraying down-wind if you need to spray your tree.
bonsai_pests.pdf
File Size: 743 kb
File Type: pdf
Download File

​Wound Healing

While it is impossible to craft bonsai without the necessary pruning and branch selection, it is possible to do everything we can to ensure the health of the tree after removing material. Check out the file below:
woundhealing.pdf
File Size: 1837 kb
File Type: pdf
Download File

Soil Studies

Our bonsai society, having the priviledge of close association with Cornell University, has the benefit of several curious, science-minded members who want to take some of the mystery out of the techniques of bonsai. One of our members has done some soil research, and is now published! His article, "Water Retention and Drainage in Bonsai Soil" by Brian Heltsley, has made it's appearance in The Journal of the American Bonsai Society, Vol. 48, No. 4 (2014), and offers a lot of insight into the critical balance of water retention and aeration to make the ideal soil conditions for bonsai. 
We have made the article, and subsequent works,  available here on the website for anyone interested in looking at the findings.
bonsai_soil_basics.pdf
File Size: 669 kb
File Type: pdf
Download File

abs_vol_48_no_4_brian_heltsley.pdf
File Size: 8666 kb
File Type: pdf
Download File

abs_vol_49_no_1_p1819.pdf
File Size: 1198 kb
File Type: pdf
Download File

Below is another soils publication Brian authored.
abs-jan-2019-final-small.pdf
File Size: 1917 kb
File Type: pdf
Download File

Check out Brian's slides from his latest presentation to our club by visiting the following url:
​https://cornell.box.com/s/5ih5do28iw5vk0dwj5y290bbbrc6lfe
l
Picture
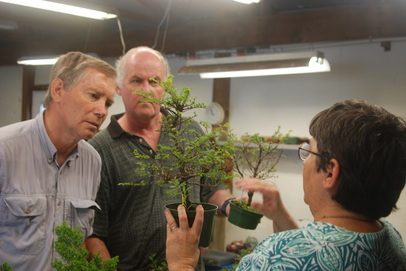
Two of our members looking at young trees at International Bonsai. Photo by J. Wiessinger.

Re-potting your bonsai

repotting.pdf
File Size: 542 kb
File Type: pdf
Download File

bonsai_repotting_steps.docx
File Size: 34 kb
File Type: docx
Download File

Picture
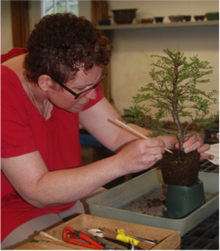
A Finger Lakes Bonsai Society member, Tomi, teasing out the roots of her new tree at an International Bonsai workshop. Photo by John Wiessinger.
Repotting is typically done every three to five years to encourage new, fine, fibrous root growth through root pruning, and to freshen the soil. Typically, this is done in the spring, and it is advised you do this then, though it could be done in the fall. It tends to have better results in the spring because the tree is already putting energy into new growth. Often you can tell if a bonsai needs repotting when the root mass is forcing the tree to lift out of the pot. 
Here is how to re-pot your tree:
In a clean work area, where you don't mind soil getting on the floor and table top, prepare your new pot. Small pieces of screen should be placed over the drainage holes and wired into place (take a bent, U shaped wire, and push it through the screen. Take both free ends of that U, and push them through the drainage hole in the pot from the inside, so that the screen in on the bottom of the inside of the pot. Bend the ends of the wire outward, flat to the bottom of the outside of the pot, securing the screen in place. Note: the screen doesn't have to be metal, it can be a piece of Latch Hook screen, which is plastic and easily found at art and craft stores). Some also suggest soaking your pot in water, so that it will not draw more water out of the soil when you place your tree in it, but this is not a mandatory step if you water your tree very well after re-potting. Take one or two long wires and tread them through the pot via the drainage holes and screens, and leave the ends coming up inside the pot (these will be used to wire in the tree later).
Un-wire your tree from its current pot. Take a knife and cut around the edges of the pot, if the tree does not easily come free, and gently work the tree out of the pot, holding the tree at the base of the trunk, where it is sturdiest.
Once the tree is out, set the old pot aside, unless you will be re-using the pot, in which case you should rinse it out and prepare it as if you were using a new pot, which is described above. 
Grasping the trunk of the tree as low as you can, hold or tip the tree so that you can take a root rake and begin to untangle the roots and dislodge the soil. Work outwards in, gently. Don't be too alarmed if a few roots break off, but don't yank whole knots out. Once all roots are teased out, take scissors or shears and prune roots back into a flat pad underneath the tree, shallow enough to fit into the desired pot. If needed, you can cut triangular wedges out of the pad, at its point going almost all the way to the trunk, to open up some space close to the trunk for better drainage and aeration. Two or three wedges, on opposite sides of the root mass works well, and the next time you re-pot you do the same thing, but rotate the wedges so that you're taking out old roots.
Take a chop stick or screw driver and aerate the roots, firmly but slowly, with a wiggling motion, pushing it down through the root mass, working from the outside towards the trunk. If it meets with intense resistence, try a different spot, don't force it to break something in the root mass.
Once roots are pruned thoroughly, it's ready to go into the new pot. Spread a layer of new soil on the bottom of the pot, and place the tree in the pot. Press and wiggle the tree into place, as desired for design, to insure that no air pocket is left underneath the roots. If needed, a scoop of soil right under where the trunk will be can help. Take the long wires from preparing the pot and cross them over the root mass, twist the ends together, and tighten them down on the tree, securing it in place. Two secured wires are preferable to make sure the tree is tight in the pot. Fill the pot with soil in scoops, working soil around the root mass with a chopstick to be sure no gaps and air pockets remain. 
Soak bonsai (submerge pot completely in water) for about ten minutes, allow to drain, and place back where it belongs. Clean work station, or continue with another tree.

Bonsai Resources:

Check out this video of our own
Senior Sensei, John Wiessinger's, garden!

Direct me to the Basics!

While we cover a lot of the basics here ourselves, especially in our monthly meetings, there's a floral group in Sydney, Australia that has put together an online booklet of bonsai basics. What makes it really nice is that they aren't experts, so they did exactly what anyone beginning does; lots of research. Instead of claiming to be the top knowledge, they merely try to accurately direct people to the bonsai info they need from top professionals. Check it out!
Flowers Across Sydney Blog

Bonsai Mirai

Home of the United States "Golden Boy" of Bonsai, Mr. Ryan Neil, Mirai is an amazing fountain of knowledge and passion for American Bonsai. Ryan began a live stream in December of 2015, and has archived them on his site. All can be accessed through subscription, but a portion of really excellent videos are free to view. We highly recommend taking the time to watch a few of his videos; Mr. Neil is an excellent and enthusiastic teacher.
Check out Bonsai Mirai

​International Bonsai

William Valavanis, who calls Rochester, New York, home, is the founder of International Bonsai and the Bonsai Society of Upstate New York. Bill is world renowned. He is the organizer of the National Bonsai Exhibition in Rochester every other year. His is a great wealth of information and experience, holding classes and workshops, and has many trees and supplies available for purchase. 
Check out International Bonsai

Miniature Bonsai

Dave Paris of Rochester, who we did a workshop with in March 2018, focuses on the growing and crafting of top quality mame and shohin bonsai, as well as supplying the best resources for crafting smaller bonsai yourself. 
Check out Miniature-Bonsai.com

Tandamiti Bonsai

Near Buffalo is where you can find Tandamiti Bonsai and Hank Miller, the originator of the fused trunk technique. This technique involves binding many rooted cuttings of ficus together to create amazing thickness in taper in very few years, shedding one or more decades off the development of a tree. He offers bonsai and pre-bonsai, stands, and workshops.
Check out Tandamiti Bonsai

PFM Bonsai

North of Albany, in West Charleton, NY, you can find pfm bonsai and Pauline Muth. One of the better known US artists, she offers classes, supplies, and lovely trees.
Check out PFM Bonsai

Bonsai Pots

Bonsai pots are any container made to house bonsai, but because they house bonsai, they have certain characteristics. Drainage is key, and many, roughly dime sized, holes provide that drainage. 
Our club had the fortune to have an opportunity to make our own pots at The Potter's Room in downtown Ithaca, but that is not always and option, and not absolutely necessary. There are many fine potters to get beautiful work from for your bonsai, many of whom can be found at regional and national exhibitions as well as online.
PictureOur bonsai pot-making experience.
Pot Basics: Bonsai pots are not only necessary for the transportation of trees, but are part of the complete design. Pots should not detract the eye from the tree. Quite the opposite, in fact. They should work so well with the tree that the eye continues to follow the form of the tree, and settles on the pot almost as an after thought.
Pots are critical to displaying your tree at its finest.
Here are some basic dimensions for the ideal pot. The pot should be as deep as the thickness (diameter) of the thickest trunk in the display. If it is a single tree, that tree has the thickest trunk. The pot should be about as wide as 2/3 the height of the tree or grouping. This gives you the ideal thin, wide pot. The only exception is in semi-cascades and cascades where you need a pot tall enough and sturdy enough to ground the tree and keep it from tipping over.
Matching Pot Style to Tree:
Rectangle pots accent straight trunks, and are often used for coniferous species, or needled deciduous like Larch. This style of pot conveys strength and formality, and has a more masculine look.
Oval pots are used for more delicate, elegent, femine trees with gently curving trunks. Flowering and fruiting species do well in oval pots, as do many forest plantings. Oval pots are often used for deciduous species.
Small Round pots accent literati or cascade styles by grounding and balancing them.
Square Deep pots are used for cascade and semi-cascade styles, where the tree must not only be physically able to remain upright, but must visually appear stable. Deep square pots often have enough visual heft to make these styles appear grounded.
Slabs (stone) accent groupings especially well, giving them a more open and natural feel, as if you looked out across a field and saw a grove of trees in the distance, but they do require more care and preperation to contain all the necessary soil that the planting needs.
Color and Textures:
Colored (Glazed) pots accent deciduous trees very well, often matching or accenting the color of spring flowers, fall fruit and changing foliage, or trunk color for winter display.
Earthy and Unglazed pots accent coniferous species, bringing some rustic aspects back to these more masculine trees, and the terracota color accents the bark of them.
Textures are tough, because it comes down to personal taste, but here is the guideline: it must not decract and distract from the tree. If it works with the tree, great. If it doesn't, even if it is your favorite pot, don't put that tree in it.

Keep in mind these are the guidelines, and may not always apply, but typically do. These criteria should help narrow your search for the right pot based on your tree.

Picture

​Bonsai Pot Repair

There are various methods to repair cracked ceramic containers before the damage becomes catastrophic. We encourage you to look up Bonsai Mirai's video on repairing a large container, but here is some info from one of our members about strengthening a smaller, thinner pot with many fine cracks.
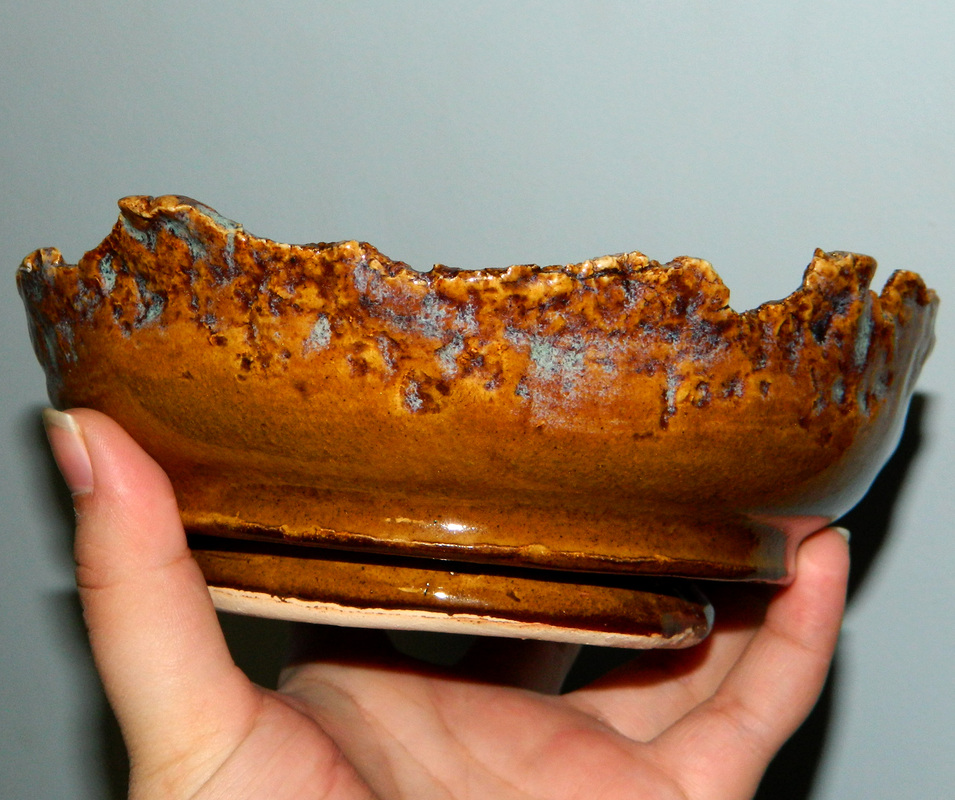
ceramic_container_repair.pdf
File Size: 1111 kb
File Type: pdf
Download File

Powered by Create your own unique website with customizable templates.
  • Home
  • About
  • Upcoming Events
  • Bonsai Info
  • Contact
  • Blog